Chest · Home, no equipment
Incline push-up: an easier push-up that still counts
Elevating your hands on a bench or step reduces the load without changing the movement pattern, which makes the incline push-up a genuine step toward a full push-up.
- Primary
- Chest
- Secondary
- TricepsFront delts
- Level
- Beginner
- Type
- Compound · Both sides together
- Sets × reps
- 3 × 10-15 reps
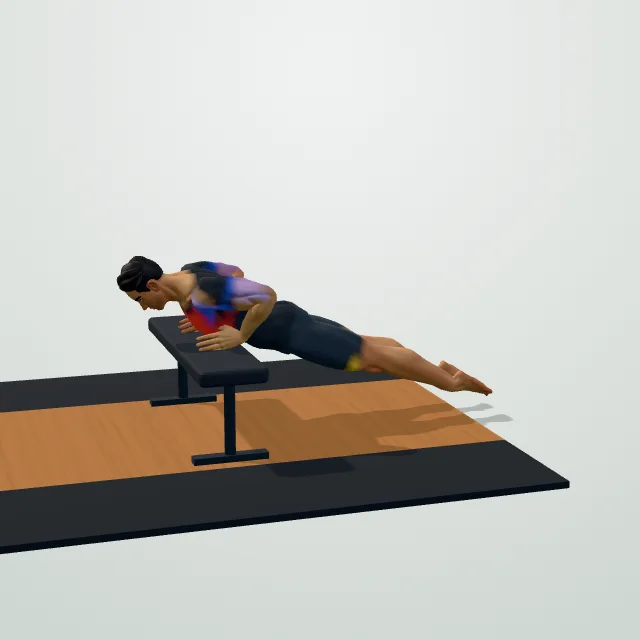
How to do it
- Place your hands slightly wider than shoulder width on a stable raised surface.
- Walk your feet back until your body forms a straight line.
- Brace your abs to keep your hips in line, not sagging or piking.
- Lower your chest toward the surface, elbows at about 45°.
- Press back up until your arms are straight.
- Repeat, keeping the same body line every rep.
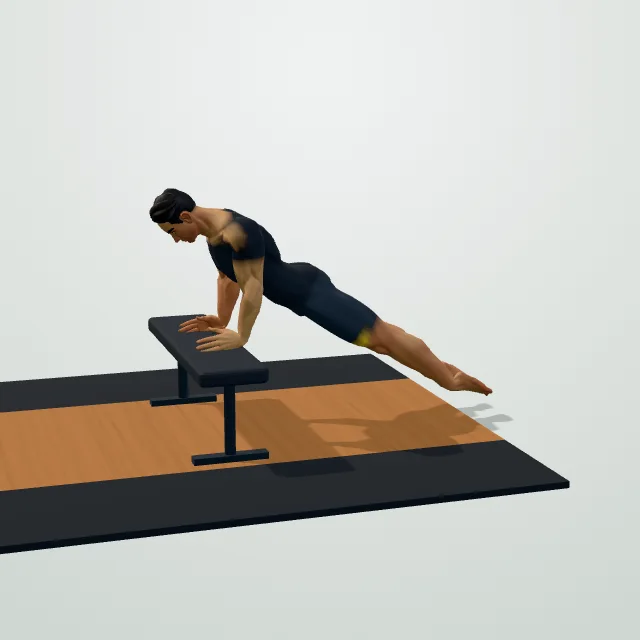
Coach cues
- Body straight, head to heels.
- Lower with elbows at about 45°.
- Chest toward the raised surface.
- Press up, keep the line straight.
Breathing: Breathe in as you lower your chest toward the surface, then breathe out as you press back up.
Common mistakes
Make it easier / Make it harder
Sets and reps by goal
| Goal | sets | reps | Rest |
|---|---|---|---|
| Strength | 4–5 | 3–6 | 2–4 min |
| Muscle growth | 3–4 | 6–12 | 90–150 s |
| Endurance | 2–3 | 15–25+ | 30–60 s |
The incline push-up is a push-up done with your hands elevated on a bench, step, or sturdy chair instead of the floor. Raising your hands reduces the percentage of your bodyweight you have to press, which makes this a genuine, useful regression rather than a completely different exercise.
Muscles worked and why
The chest is the prime mover, with the front shoulders and triceps assisting, exactly as in a standard push-up. Elevating your hands changes the angle your body presses at, which lowers the load on the same muscles rather than shifting the work to different ones — the higher the surface, the lighter the exercise becomes.
Benefits
Because you can pick any height — a step, a bench, a low wall, a kitchen counter — the incline push-up gives you a simple way to dial in a difficulty that matches your current strength, then gradually lower the surface as you get stronger. It is a common recommendation for beginners, for anyone returning to training after time off, and for building up push-up numbers before a fitness test.
Bench height, hand position and body line
Choose a stable surface — a bench, step, or sturdy chair that will not slide or tip. Place your hands slightly wider than shoulder width on the edge, and walk your feet back until your body forms a straight line from head to heels, the same body line you would hold in a standard push-up.
Lower your chest toward the raised surface, elbows at roughly 45° from your torso, keeping your hips in line rather than letting them sag or pike. Press back up until your arms are straight. The higher the surface, the easier the rep — a hip-height bench is noticeably easier than a low step, so pick a height where your last couple of reps still have good form.
How to program it
3 sets of 10–15 reps with 60–90 seconds of rest works well while building toward the standard push-up. Once you can complete 15 or more clean reps at a given height, lower the surface slightly and continue, which is the same progressive overload idea used for weighted lifts — see progressive overload. Leave a rep or two in reserve rather than grinding every set to failure, per the RPE and RIR guide.
Progressing toward a standard push-up
Work down through heights over weeks: a high bench, then a lower step, then the floor for a standard push-up. If an incline push-up on a bench is still too demanding, the knee push-up reduces the load a different way and can be combined with an incline for an even easier starting point. Once standard push-ups feel comfortable, the decline push-up (feet elevated instead) is the next step up.
Incline vs decline push-up
These sit at opposite ends of the same scale: elevating your hands (incline) reduces the load and is easier; elevating your feet (decline) increases the load and is harder. Both use the same body line and the same muscles — the incline push-up is where most people start, and the decline push-up is where more advanced trainees add challenge once bodyweight push-ups feel too easy.
Safety: who should modify it
Use a surface that is stable and will not slide or tip under load — an unstable bench is the main safety issue with this exercise. Keep your body in a straight line rather than letting your hips sag, which strains the lower back over repeated sets. This is a sensible option during pregnancy or when recovering from a wrist, shoulder or chest injury; check with a doctor or physiotherapist if you are unsure which height is appropriate.
Choosing the right height for you
A useful rule of thumb: pick a height where you can complete 8–10 reps with a straight body line and full range, and your last two reps are noticeably harder than your first. If every rep feels identical and easy, the surface is too high and you will progress faster by lowering it. If your form breaks down — hips sagging, or you cannot complete a full rep — the surface is too low for today, and stepping up a level is the better choice than grinding through poor reps. Reassess every week or two rather than staying at one height indefinitely once it stops feeling challenging.
Questions people ask
What muscles does the incline push-up work?
Are incline push-ups easier than regular push-ups?
What height should I use for incline push-ups?
How do I progress from incline push-ups to standard push-ups?
Are incline push-ups good for beginners?
Do incline push-ups work the chest less than regular push-ups?
Can incline push-ups build muscle?
General fitness information, not medical advice. Check with a doctor or physiotherapist before starting if you have a health condition, an injury or are pregnant. Stop if you feel chest pain, dizziness or sharp pain.